
There’s a secret when it comes to photographing a garage conversion project: it’s not about making it look pretty.
Yes, we agree that one of the most exciting parts of a finished project is showing off those before-and-after photos. However, those before photos can be more important than you realize when it comes to getting to that final product at all.
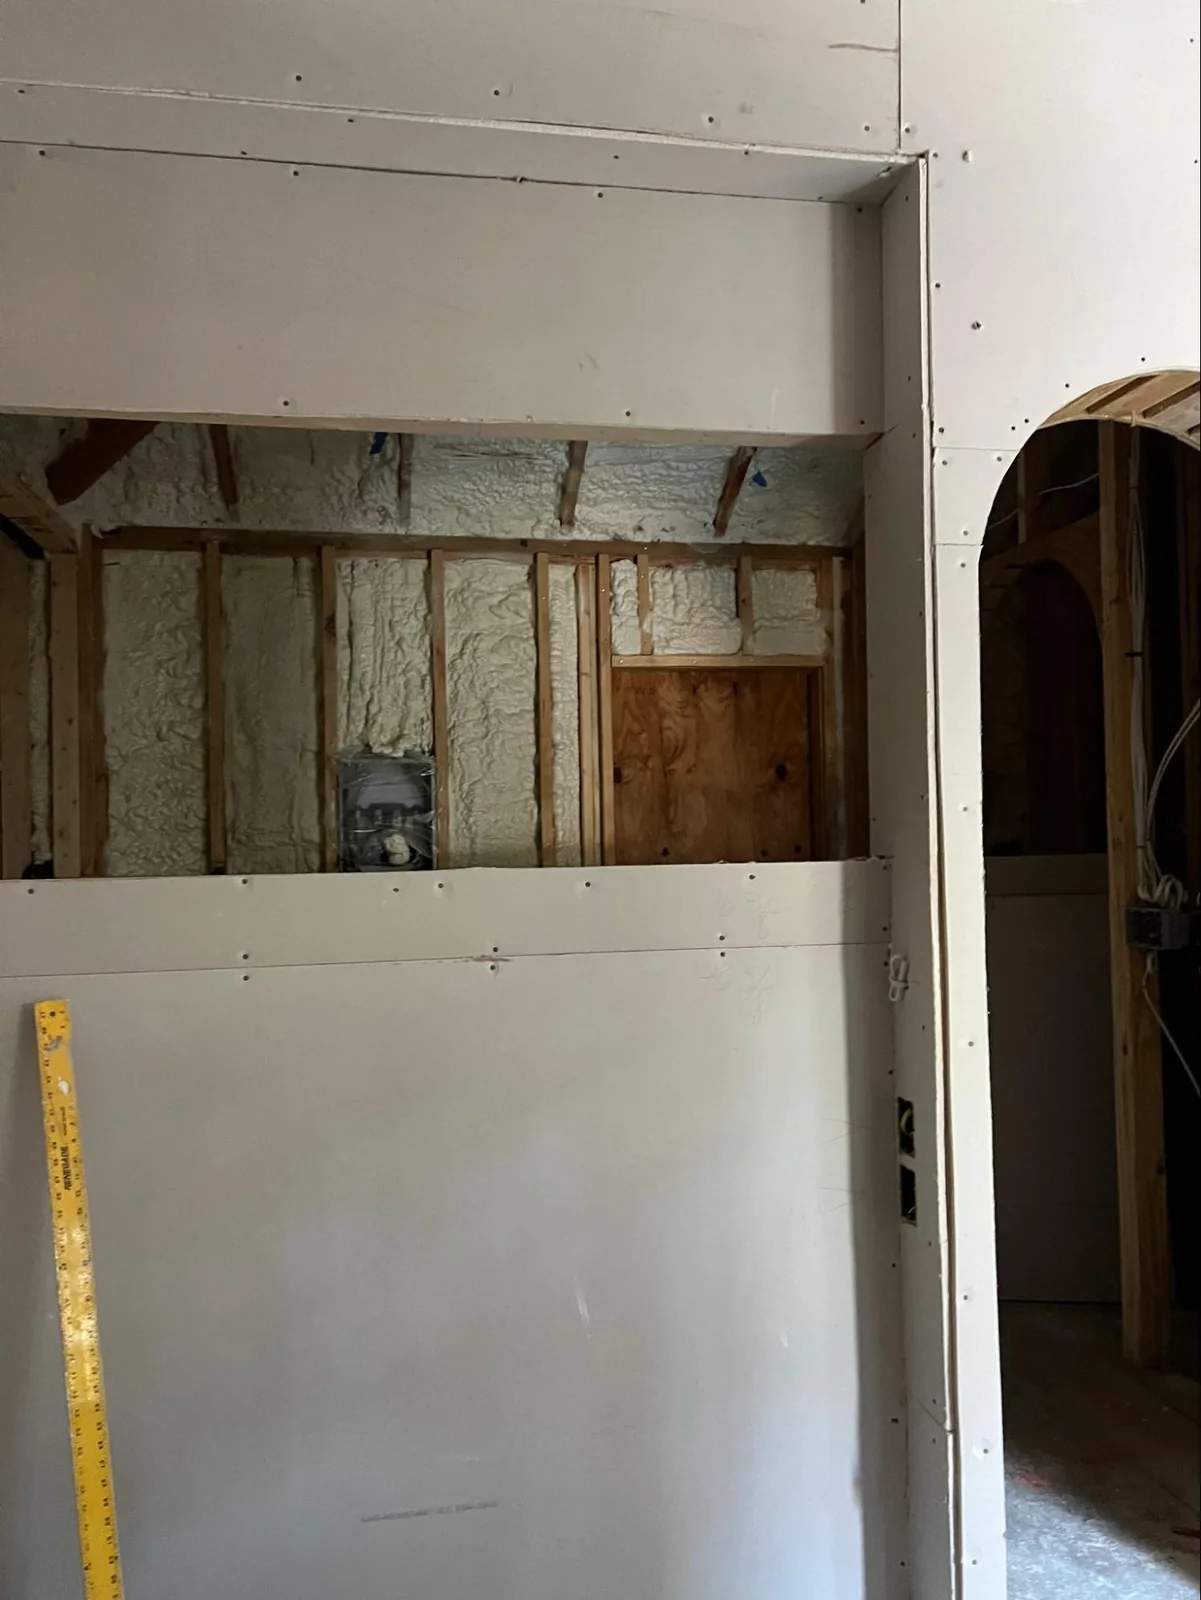
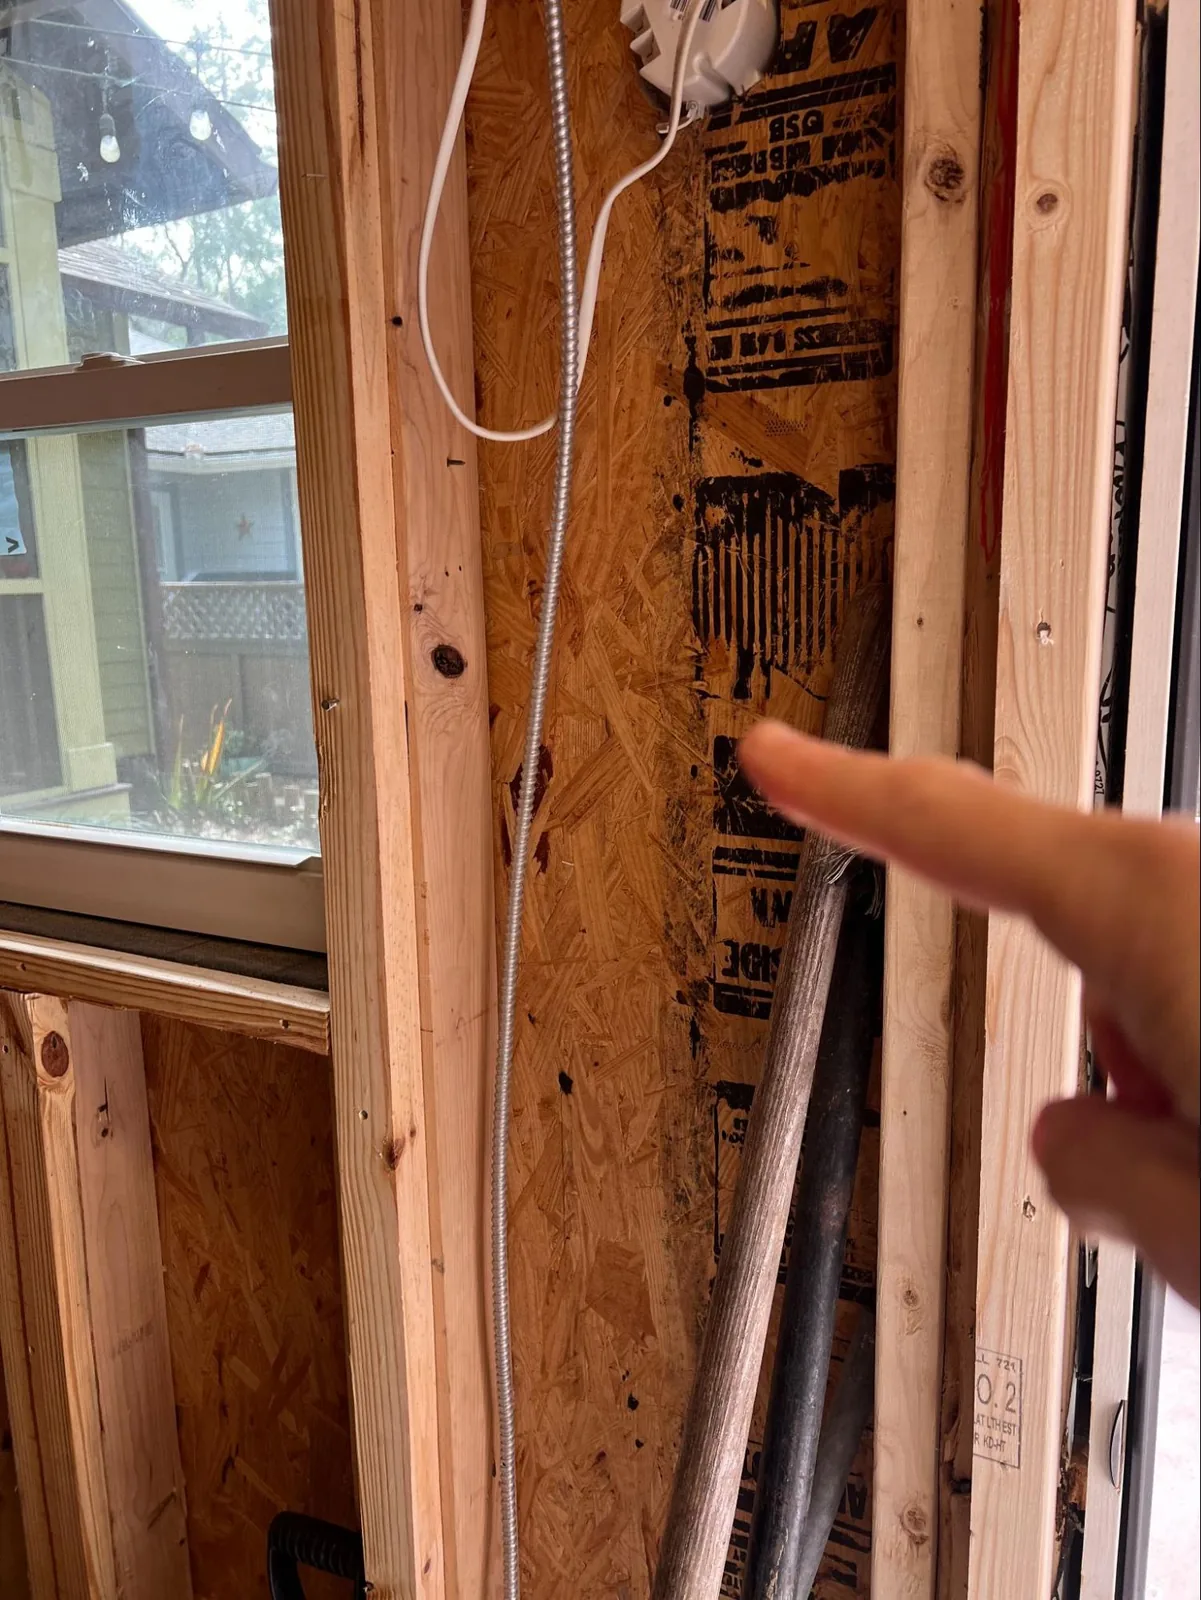
They can help you remember where something is, how something was built, what finish you used, where the studs were, where the blocking was added, how high something was installed, and what the space looked like before everything got covered up with drywall, tile, cabinetry, trim, paint, and pretty things.
It’s a visual history of what was there, what needs to be done, what can be done, and what has been done.
For example, just the other day, I had to scroll back in my phone to find some plumbing photos from before the drywall went on the walls. That way, when we were building a closet on the opposite wall, we didn’t screw into the plumbing. Luckily, I had the photos.
So how do you capture everything so that you can get the most out of your work?
In This Blog
- Take Measurements Before the Walls Close Up
- Think Ahead for Grab Bars
- Make a Map for Where Your Supports Are
- Sometimes, It’s About the Pretty Details
- Make the Details Easier to Remember With This Fun Trick
- Take Before-and-After Photos Too
- What’s on Our Must-Photograph List
- The Big Lesson
Take Measurements Before the Walls Close Up
While the wall is open, it can be like reading a map.
Once the drywall goes up, you are covering up visual information about where studs are, where plumbing and electrical run, and where extra support was added. That is why it’s important to take photos before you close the walls.
Our pro tip: Remember to use a measuring tape while taking pictures.
Start from the floor and measure up to the height of studs, backing, or blocking. This way, it won’t be a guessing game later on when you’re looking for the right place to hang or install something.
Think Ahead for Grab Bars
Grab bars aren’t something you want to play a guessing game with.
Whether you are making a mother-in-law suite for an older person, an ADA-compliant space, or a space created for someone who needs a little extra support now or in the future, they are an important feature that needs to be planned out carefully.
You want to make sure that you are installing them properly so that you can be sure that whoever is using them is safe to put their weight on them.
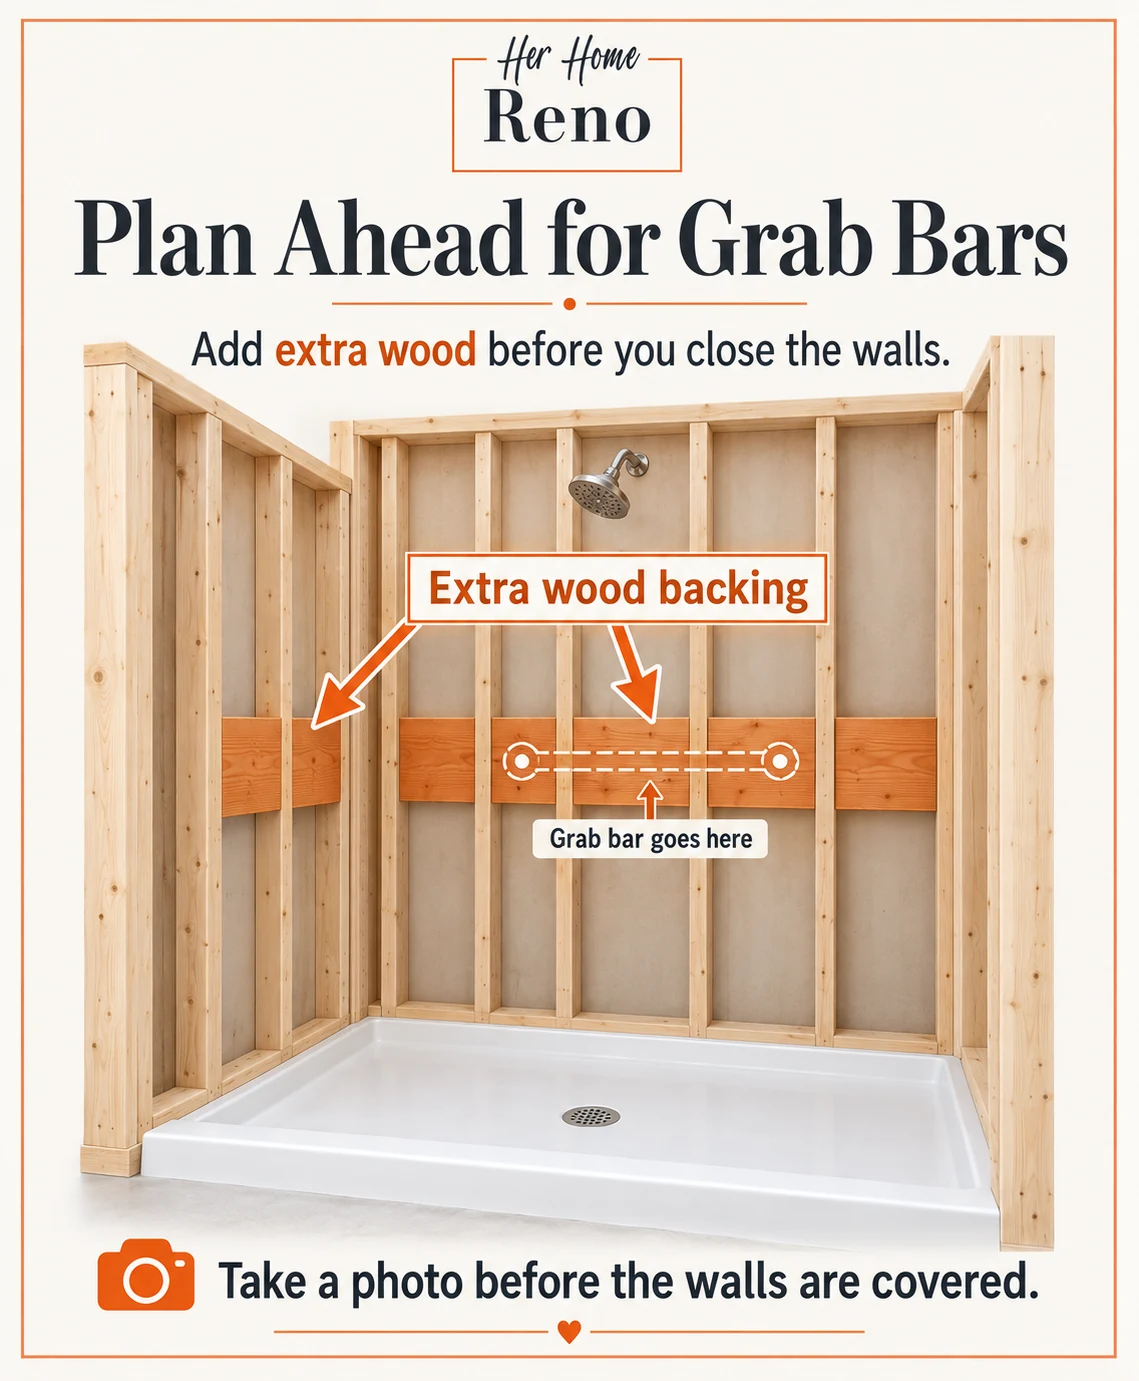
While you are mapping out the bathroom in your pre-building stage, mark off where you might need to install grab bars down the road.
Some good areas to think about:
- The shower
- The toilet
- The tub
- The entry into the shower
- Anywhere someone may need to steady themselves
After you’ve put the blocking up, take pictures of the locations and measurements before you close up the walls. Even if you don’t plan to install grab bars immediately, you’ll have the reference photos to look back on when the time comes.
Make a Map for Where Your Supports Are
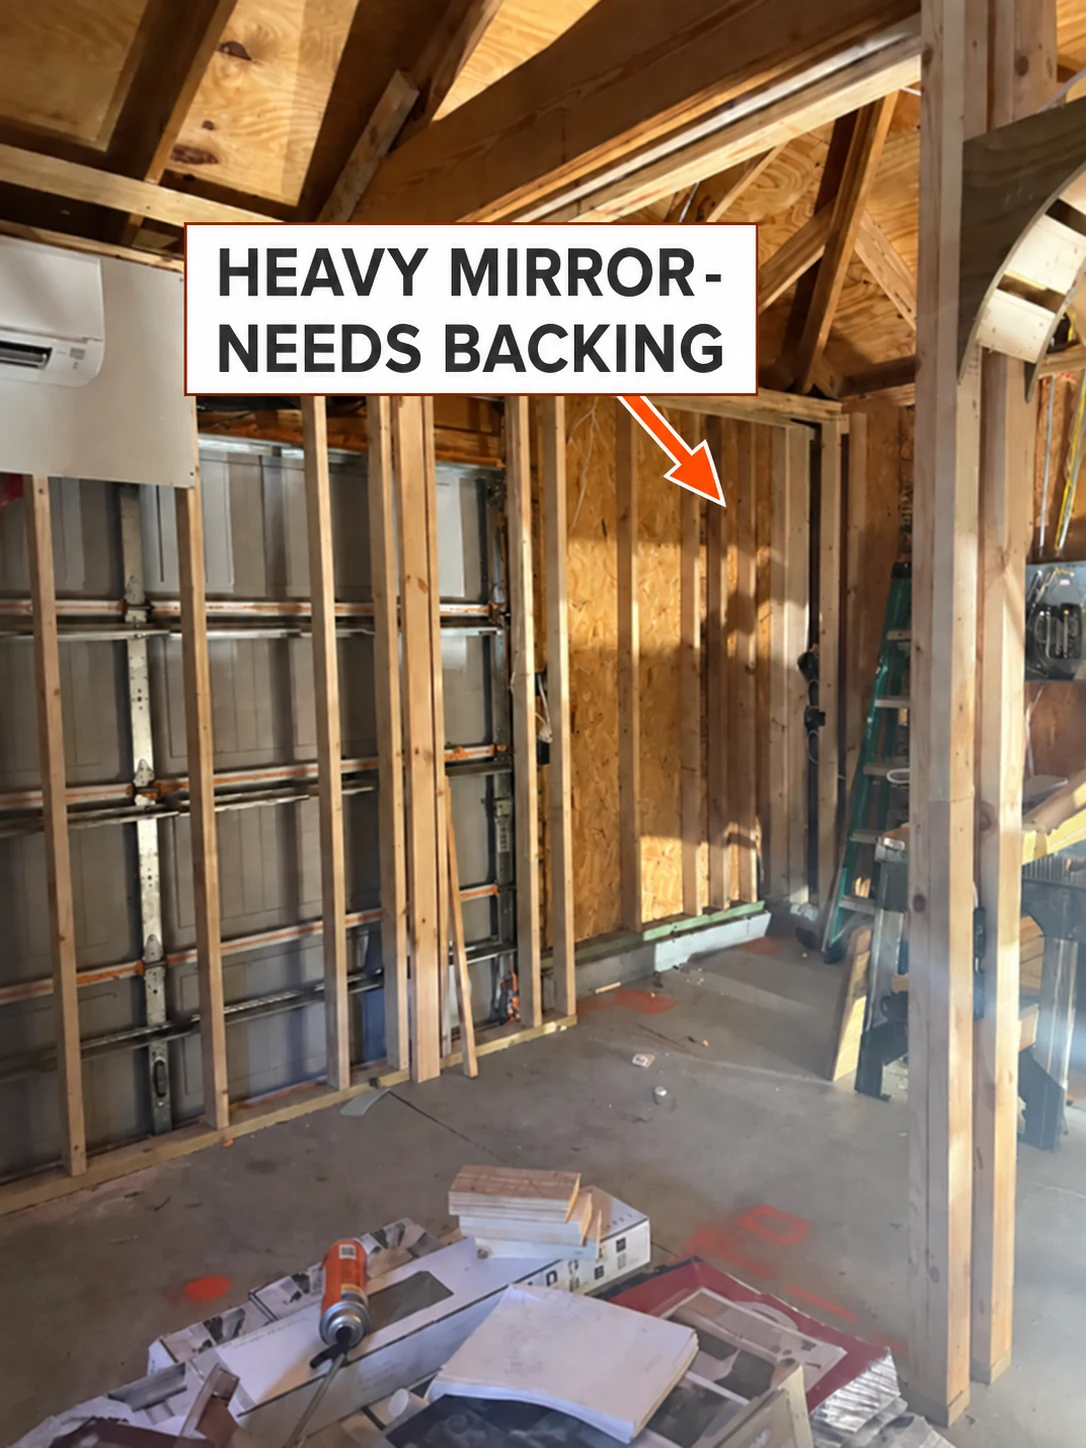
Grab bars aren’t the only things that need strong support. So do heavy mirrors and cabinetry.
Installing cabinets, shelves, floating vanities, or any other heavy feature that will be used on a daily basis will be made much easier when you know what is behind the walls.
Knowing exactly where your studs and blocking are will reduce stress and give you peace of mind that everything will hold.
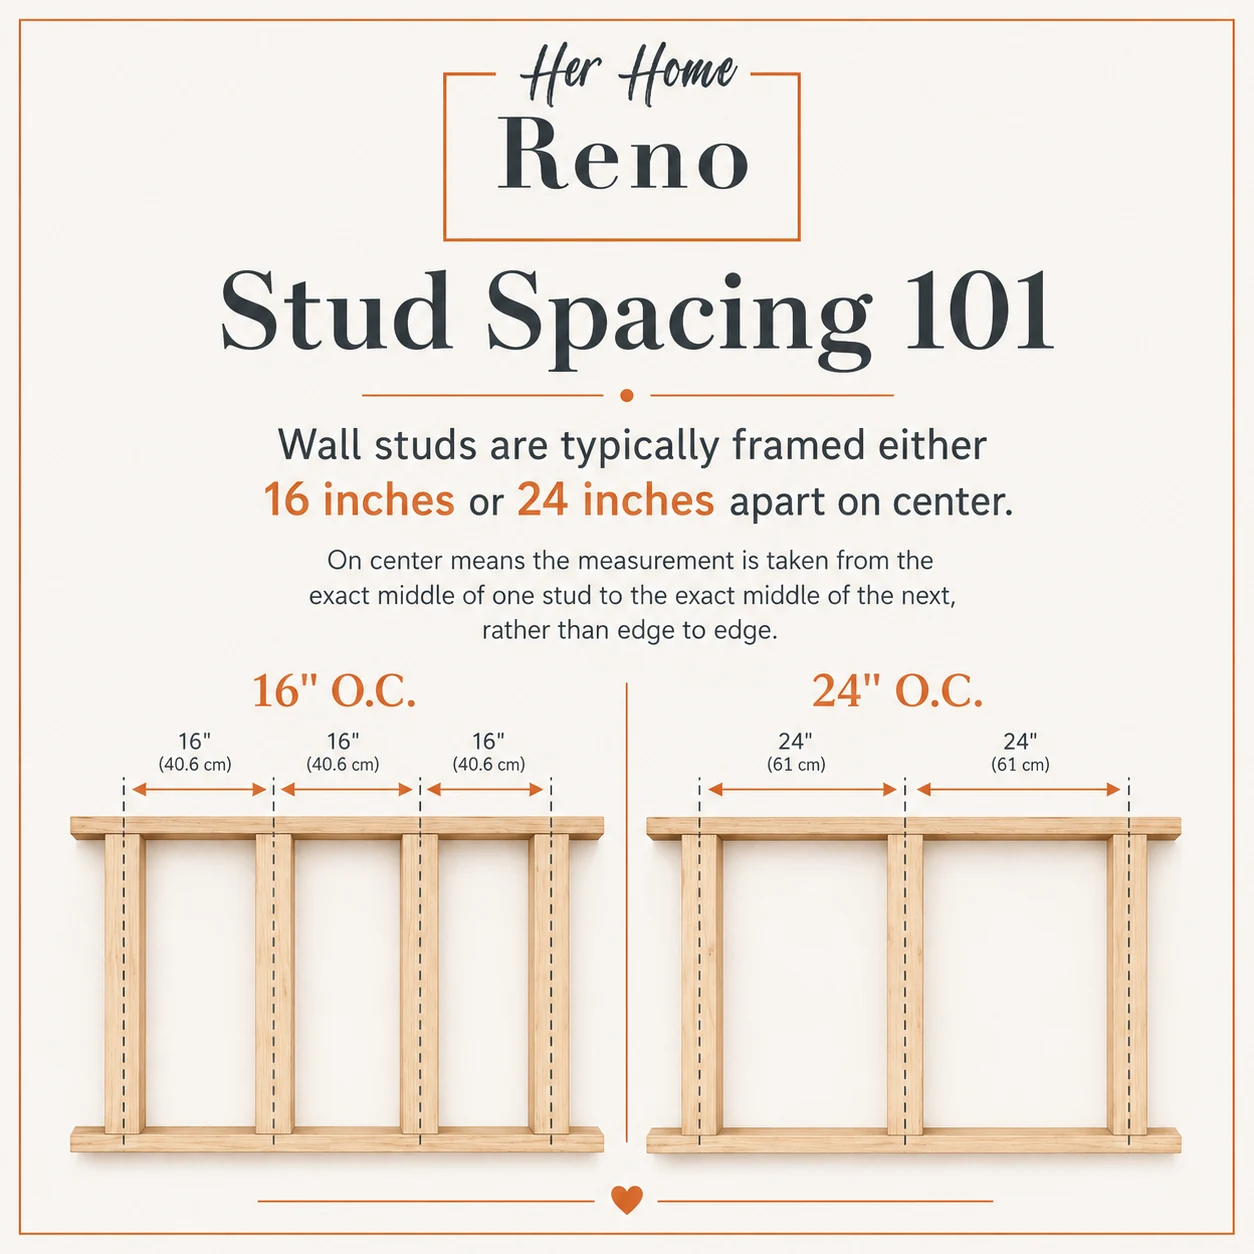
Wall studs are typically spaced 16 inches or 24 inches on center (O.C.). “On center” means the measurement is taken from the center of one stud to the center of the next stud, rather than from edge to edge.
So, as you build the structure of the walls, think about what you want to install and where it will be installed.
Make sure to take pictures with measurements included so that you know exactly where to drill holes.
Sometimes, It’s About the Pretty Details
Photos don’t just provide a map of where studs, blocking, and supports are. They also help you remember details about decisions you’ve made about finishes.
So, yes, the pretty details matter just as much as the practical details when taking photos during the process!
Your finishes will not rely as much on the inner workings of the walls as grab bars and cabinetry do, but your photos along the way can still serve as a reminder. After all, there are a lot of decisions to be made. It’s very easy for things to slip through the cracks if you leave it all down to a mental checklist.
Besides reminding you about things you need to remember, like what trim goes where or what color the vanity is going to be, having the photos to reference will help you make better decisions when comparing options, looking through the aisles of a store, or talking to a contractor.
To better understand how to think about it, a simple photo of a wall can answer questions like:
- How much space is to the right of the window?
- How much space is to the left of the window?
- How much room is above the window?
- How much room is below the window?
- Where does the trim start and stop?
- Where will wallpaper end?
- Where will paint change?
- Where should a curtain rod go?
- What size shade or blind do I need?
Asking questions like this will help you plan how to take photos of the space so that you have that perfect picture to look back on and make sure you’re buying the right thing.
Make the Details Easier to Remember With This Fun Trick
If you want to make measurements easier to remember, and maybe have fewer photos to keep track of, try one of our favorite tricks.
It’s simple:
- Take a straight-on photo of a wall.
- Print it out.
- Write all over it.
Take the measurements from the window to each wall, to the ceiling, and to the floor. Mark them on the photograph.
Write down the size of the trim, the desired wall color, the desired ceiling color, the tile size, the grout color, or any other detail you may need to remember.
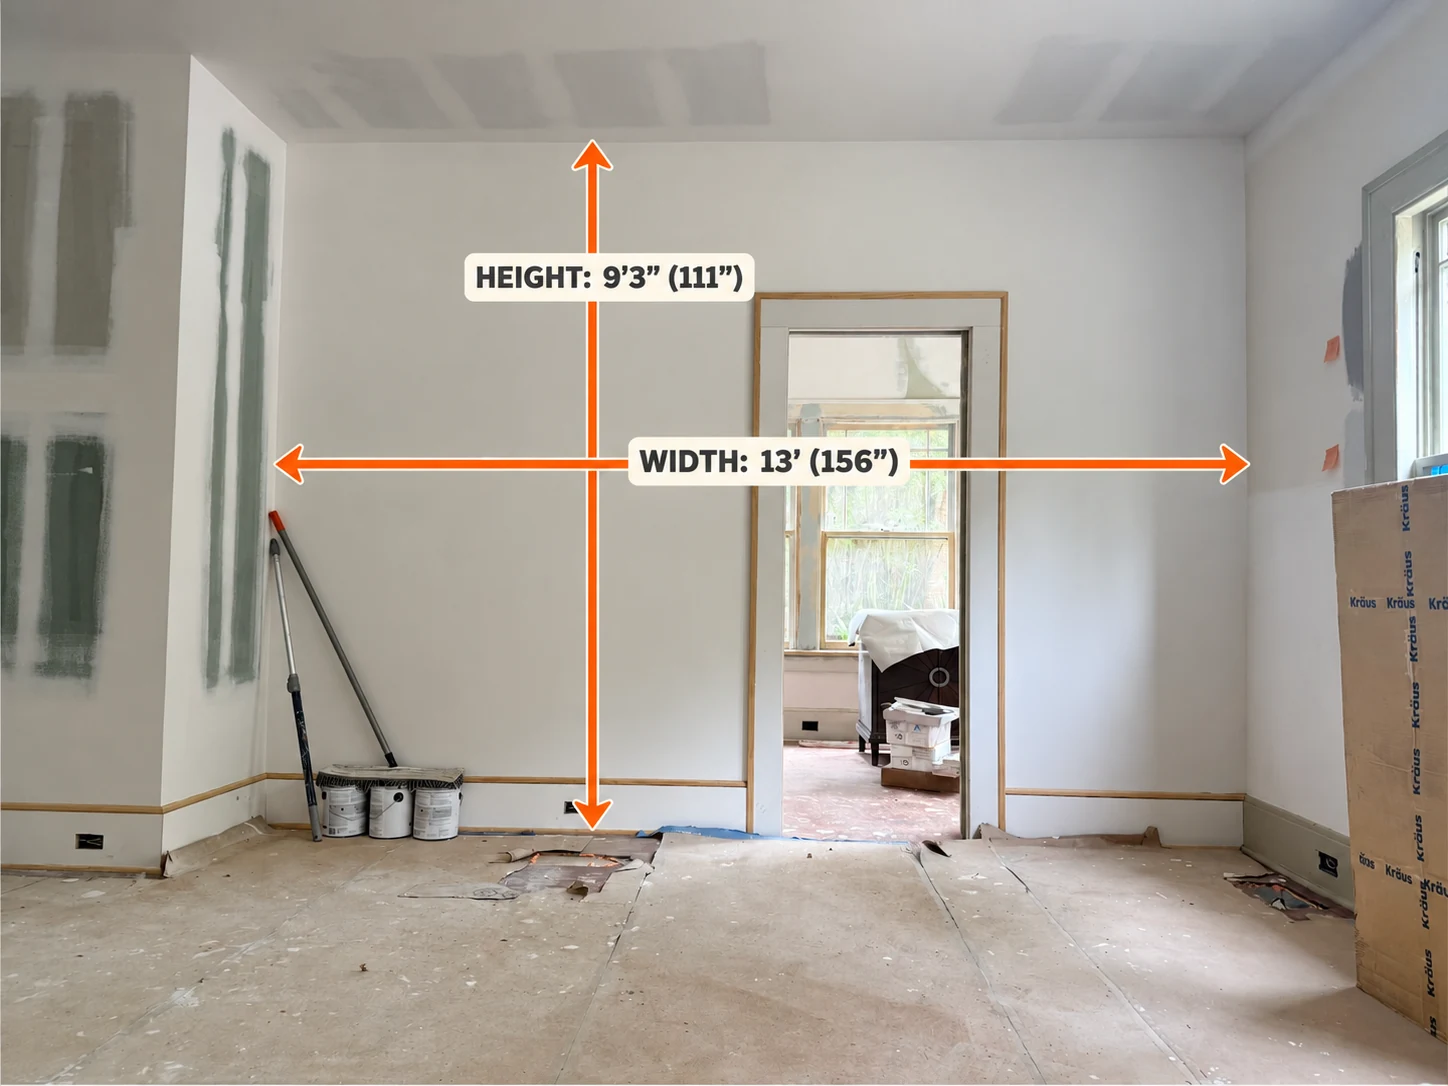
It’s not the fanciest thing, and it may not be the most elegant, but it’s incredibly useful, and it provides you with a way to put all the details in one place.
A picture really is worth 1,000 words during a renovation, and sometimes, it’s also worth 1,000 fewer headaches.
Yes, Take Pretty Before-and-After Photos Too, But Watch Your Perspective
You might not want to document your garage as it is right now, but you should.
Taking pictures of what the space looks like before anything happens will remind you just how far you’ve come when things look nothing like they did before.
You might think you’ll remember, but it only seems easy because it’s still in front of you. Once the big changes start happening, it’ll be harder to imagine what it all looked like at the start.
ONE BONUS REASON FOR TAKING BEFORE PHOTOS…
So you can really see the transformation when the project is finished.
But here’s the trick: when you take your “after” photos, go back and look at your “before” photos first. Then stand in the same spot and take the photo from the same angle.
It makes a HUGE difference.
There is nothing more confusing than seeing a before photo taken toward a window, and then the after photo is from the opposite side of the room. Your brain has to work way too hard to figure out what actually changed.
When the before-and-after photos are taken from the same angle, people instantly understand the transformation — and it makes your project look so much more impressive when you post it on social media.
So do yourself a favor: same spot. Same angle. Before and after.
Having the photos not only gives you a reminder of just how far you’ve come, but will help you appreciate all the blood, sweat, tears, time, and money that were put into the project.
They can be used to show off the space to friends and family, or to post online as a dramatic before-and-after reveal. They can be used in a rental listing, to show a contractor what has been done, or simply to remember the experience of creating a beautiful new space.
So take those pictures. Capture all the ugly details so that you can make the pretty ones shine ever brighter at the end.
What’s on Our Must-Photograph List
Here is what we photograph during almost any renovation:
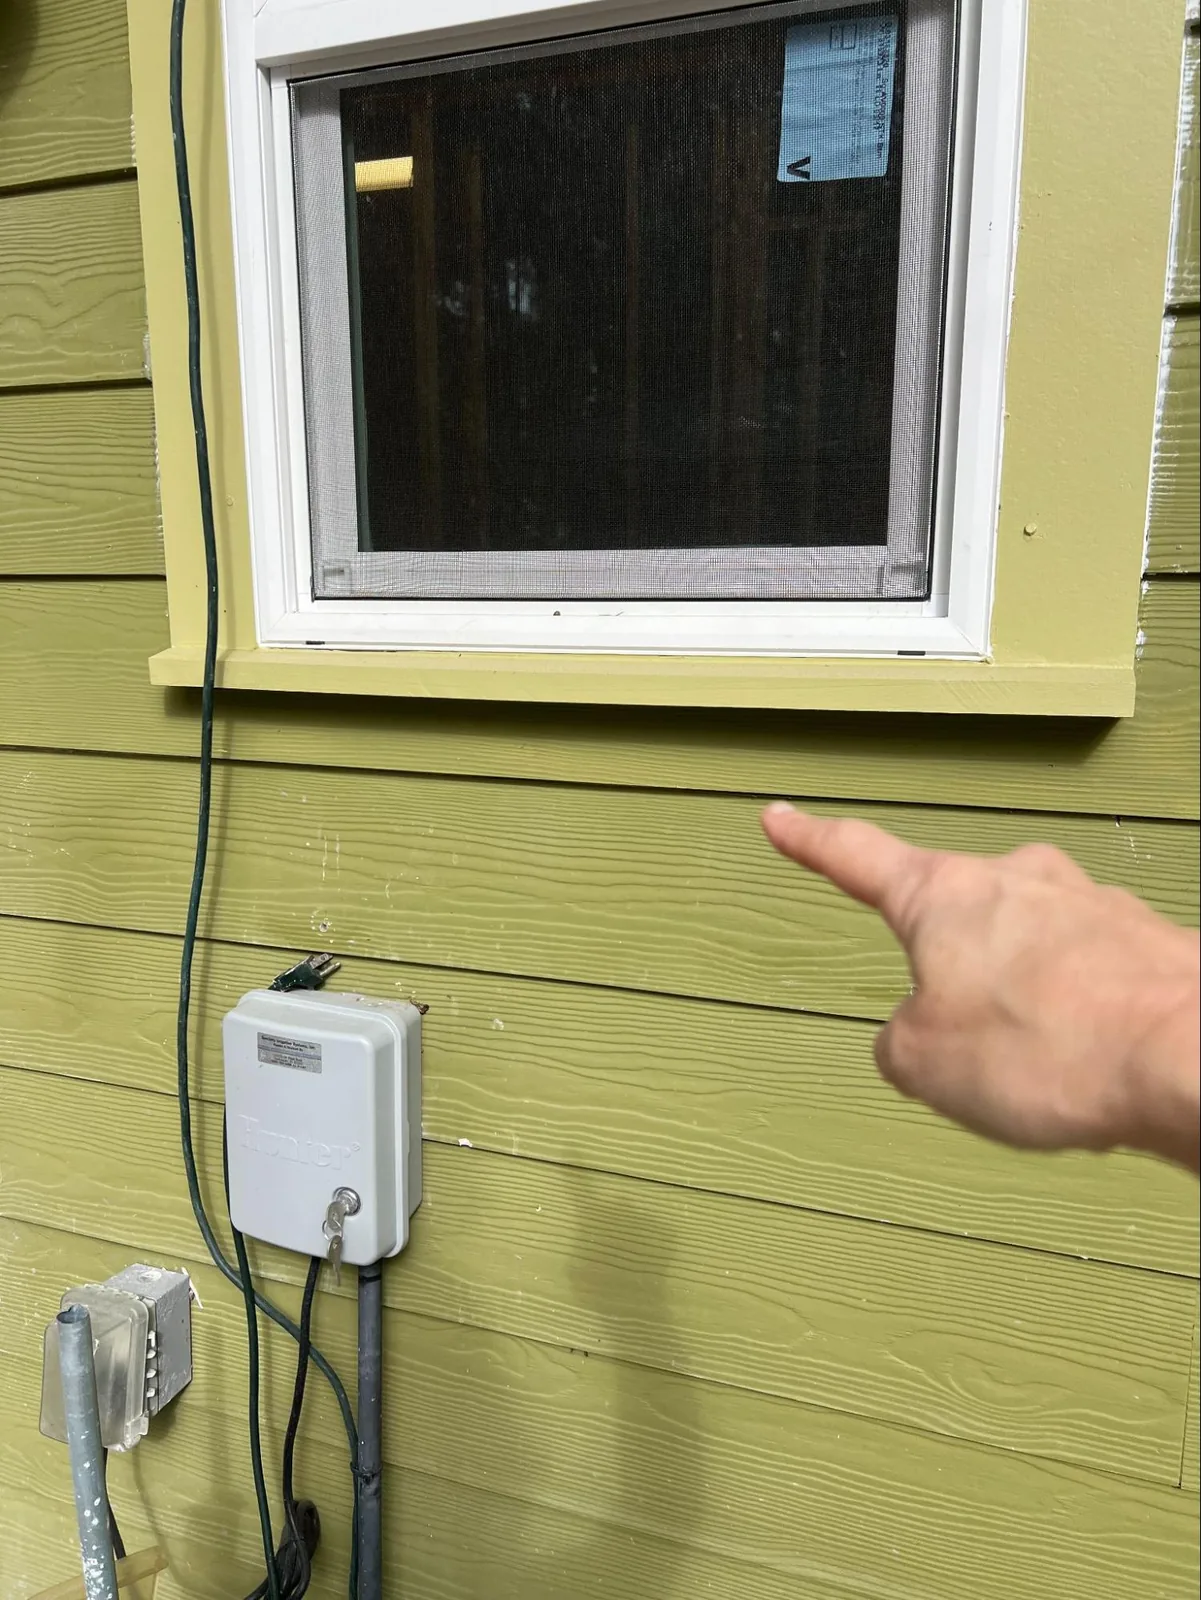
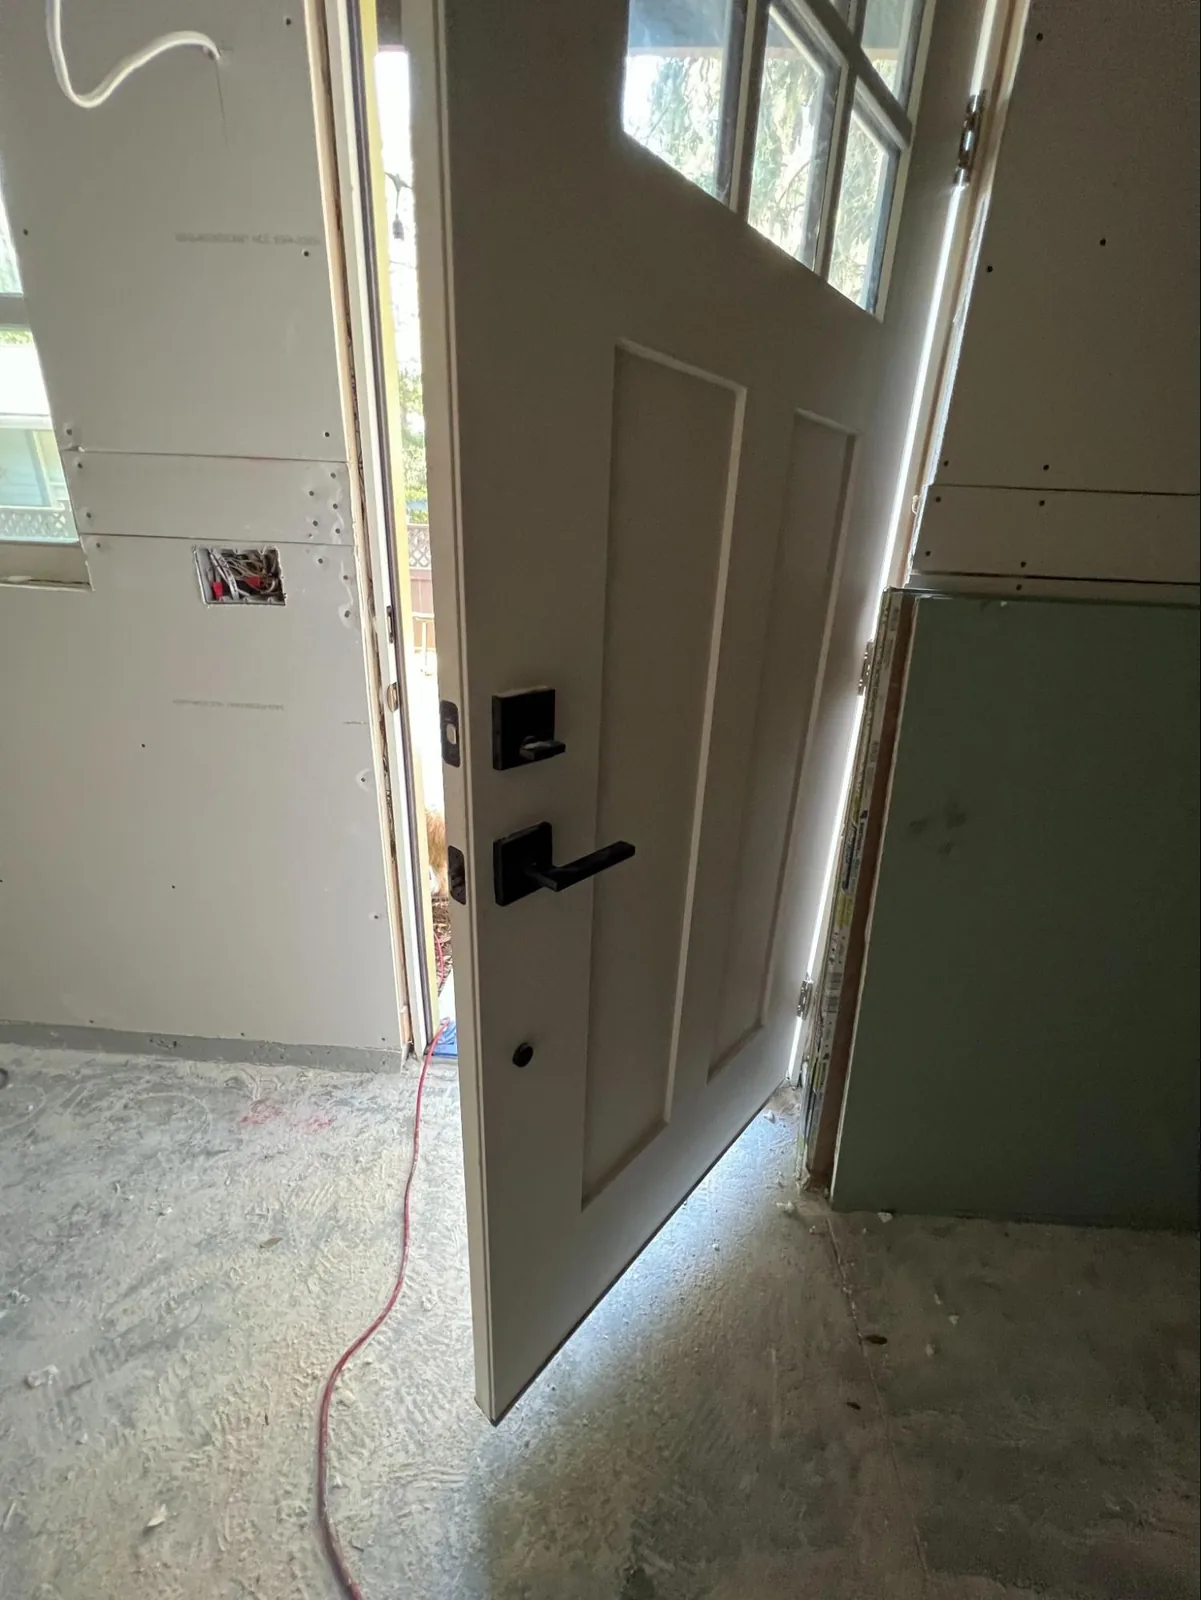
- Every wall before demolition
- Every wall once it is open
- Stud locations
- Blocking or backing
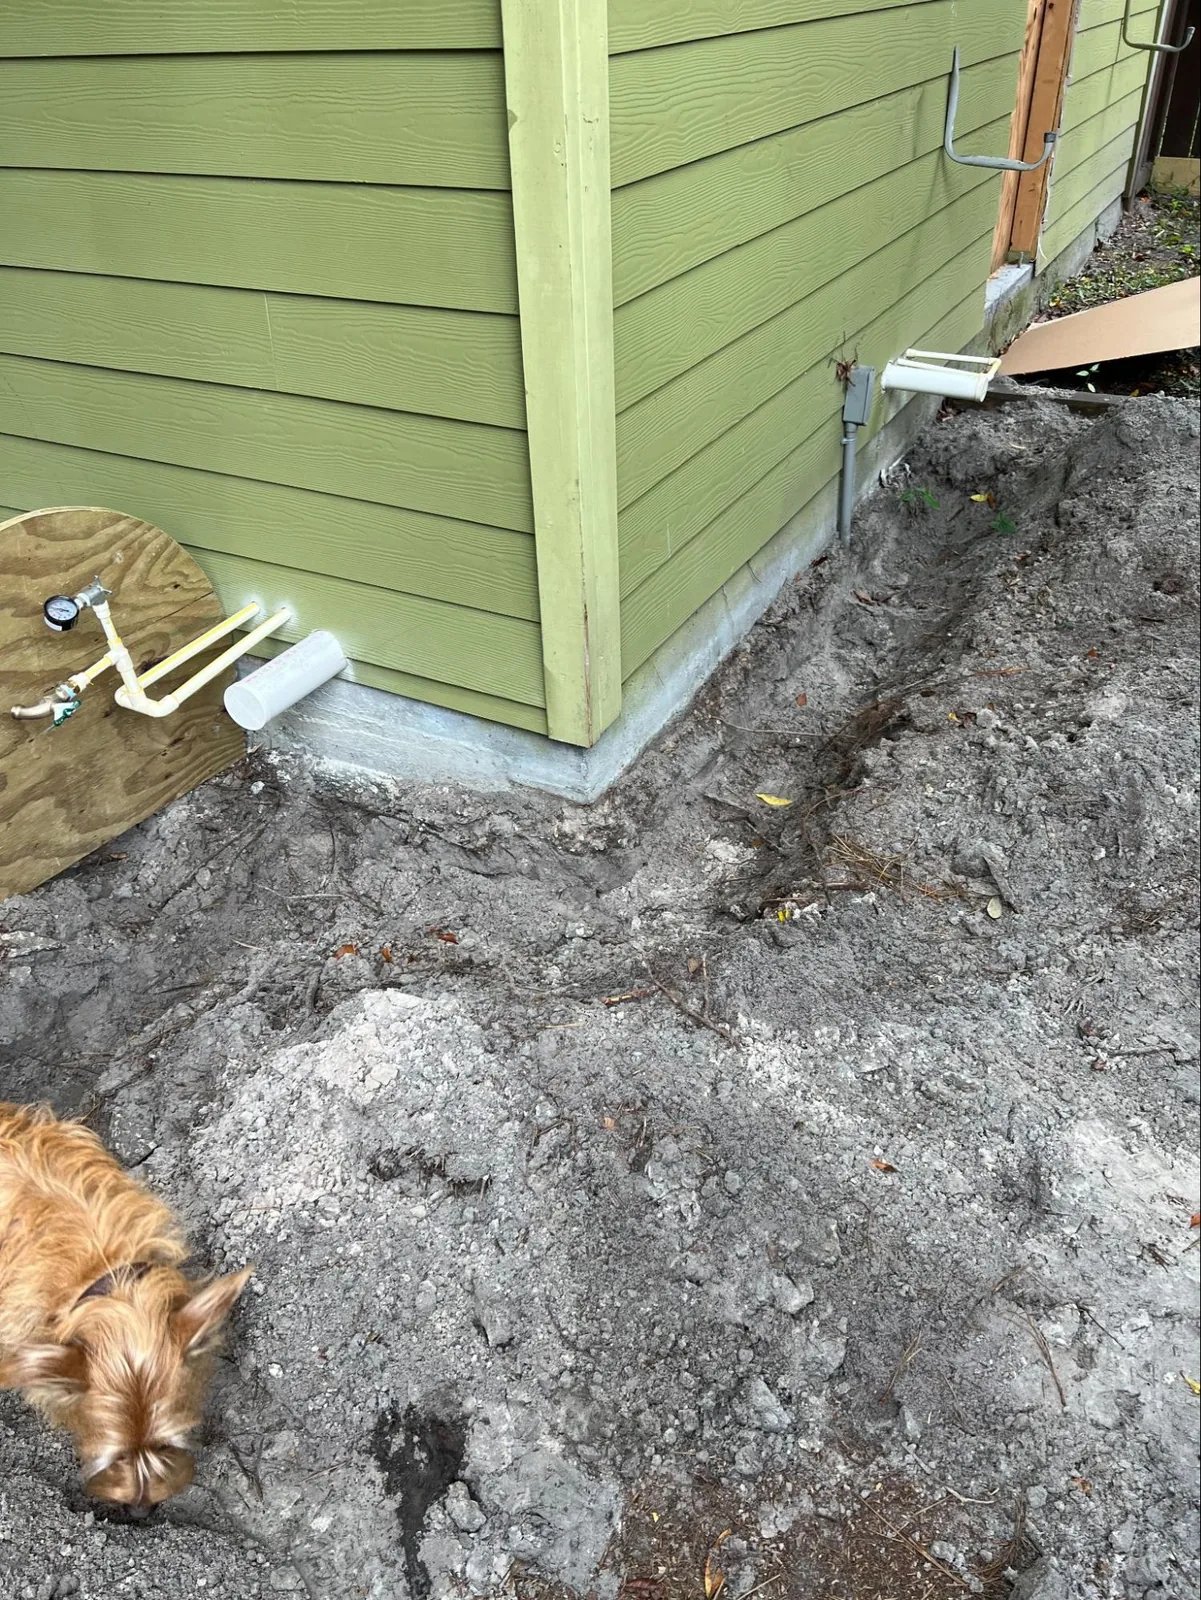
- Plumbing locations
- Electrical locations
- Ceiling framing
- Cabinet backing
- Grab bar backing
- Shower walls before tile
- Flooring transitions
- Paint colors
- Tile boxes and labels
- Grout colors
- Trim details
- Window measurements
- Door swings
- Closet layouts
- Appliance openings
- Lighting locations
- The finished room from every angle
The Big Lesson
Although it’s a fun part of the project, photos of the process are not just for showing off the finished project.
They are key to the progress of the project. They help you avoid mistakes. They remind you about details that might have slipped your mind.
Most importantly, they remind you how far you’ve come.
Even after the conclusion of the project, they might still help you answer a question you didn’t even know you were going to have, like if there’s a way to install something new on a wall or where exactly the plumbing goes.
So, take the pictures.
Take boring pictures. Take measurements. Take close-ups. Take the pictures where you question yourself about why you’re taking the picture at all.
One day, you may be standing in that finished space with a drill in your hands, a towel hook in the other, and a sense of gratitude that you did.